How to Implement RabbitMQ Messaging Between Two Laravel Apps -- Part One


Having spent a couple of days trying to implement rabbitMQ messaging between Two Laravel applications, there seems to be no article that gives details of the workflow implementation
In this article, am going to explain how to achieve a simple microservice flow between two apps and rabbitMQ as the message-broker
"RabbitMQ is an open-source message-broker software that originally implemented the Advanced Message Queuing Protocol and has since been extended with a plug-in architecture to support Streaming Text Oriented Messaging Protocol, MQ Telemetry Transport, and other protocols."
source: https://en.wikipedia.org/wiki/RabbitMQ
In this article, am aiming to achieve two things
- Send rabbitMQ message from one Laravel app to another
- Send data from one Laravel app to another vis the message channel of rabbitMQ via a Post Request.
Let Get Started
- Setup CloudAMPQ visit the rabbitMQ as a service website and create an account, once your account is set up a login and create an instance
from the instance dashboard, you will need to obtain the following parameter, HOST, PORT, USER, PASSWORD, AND VHOST,
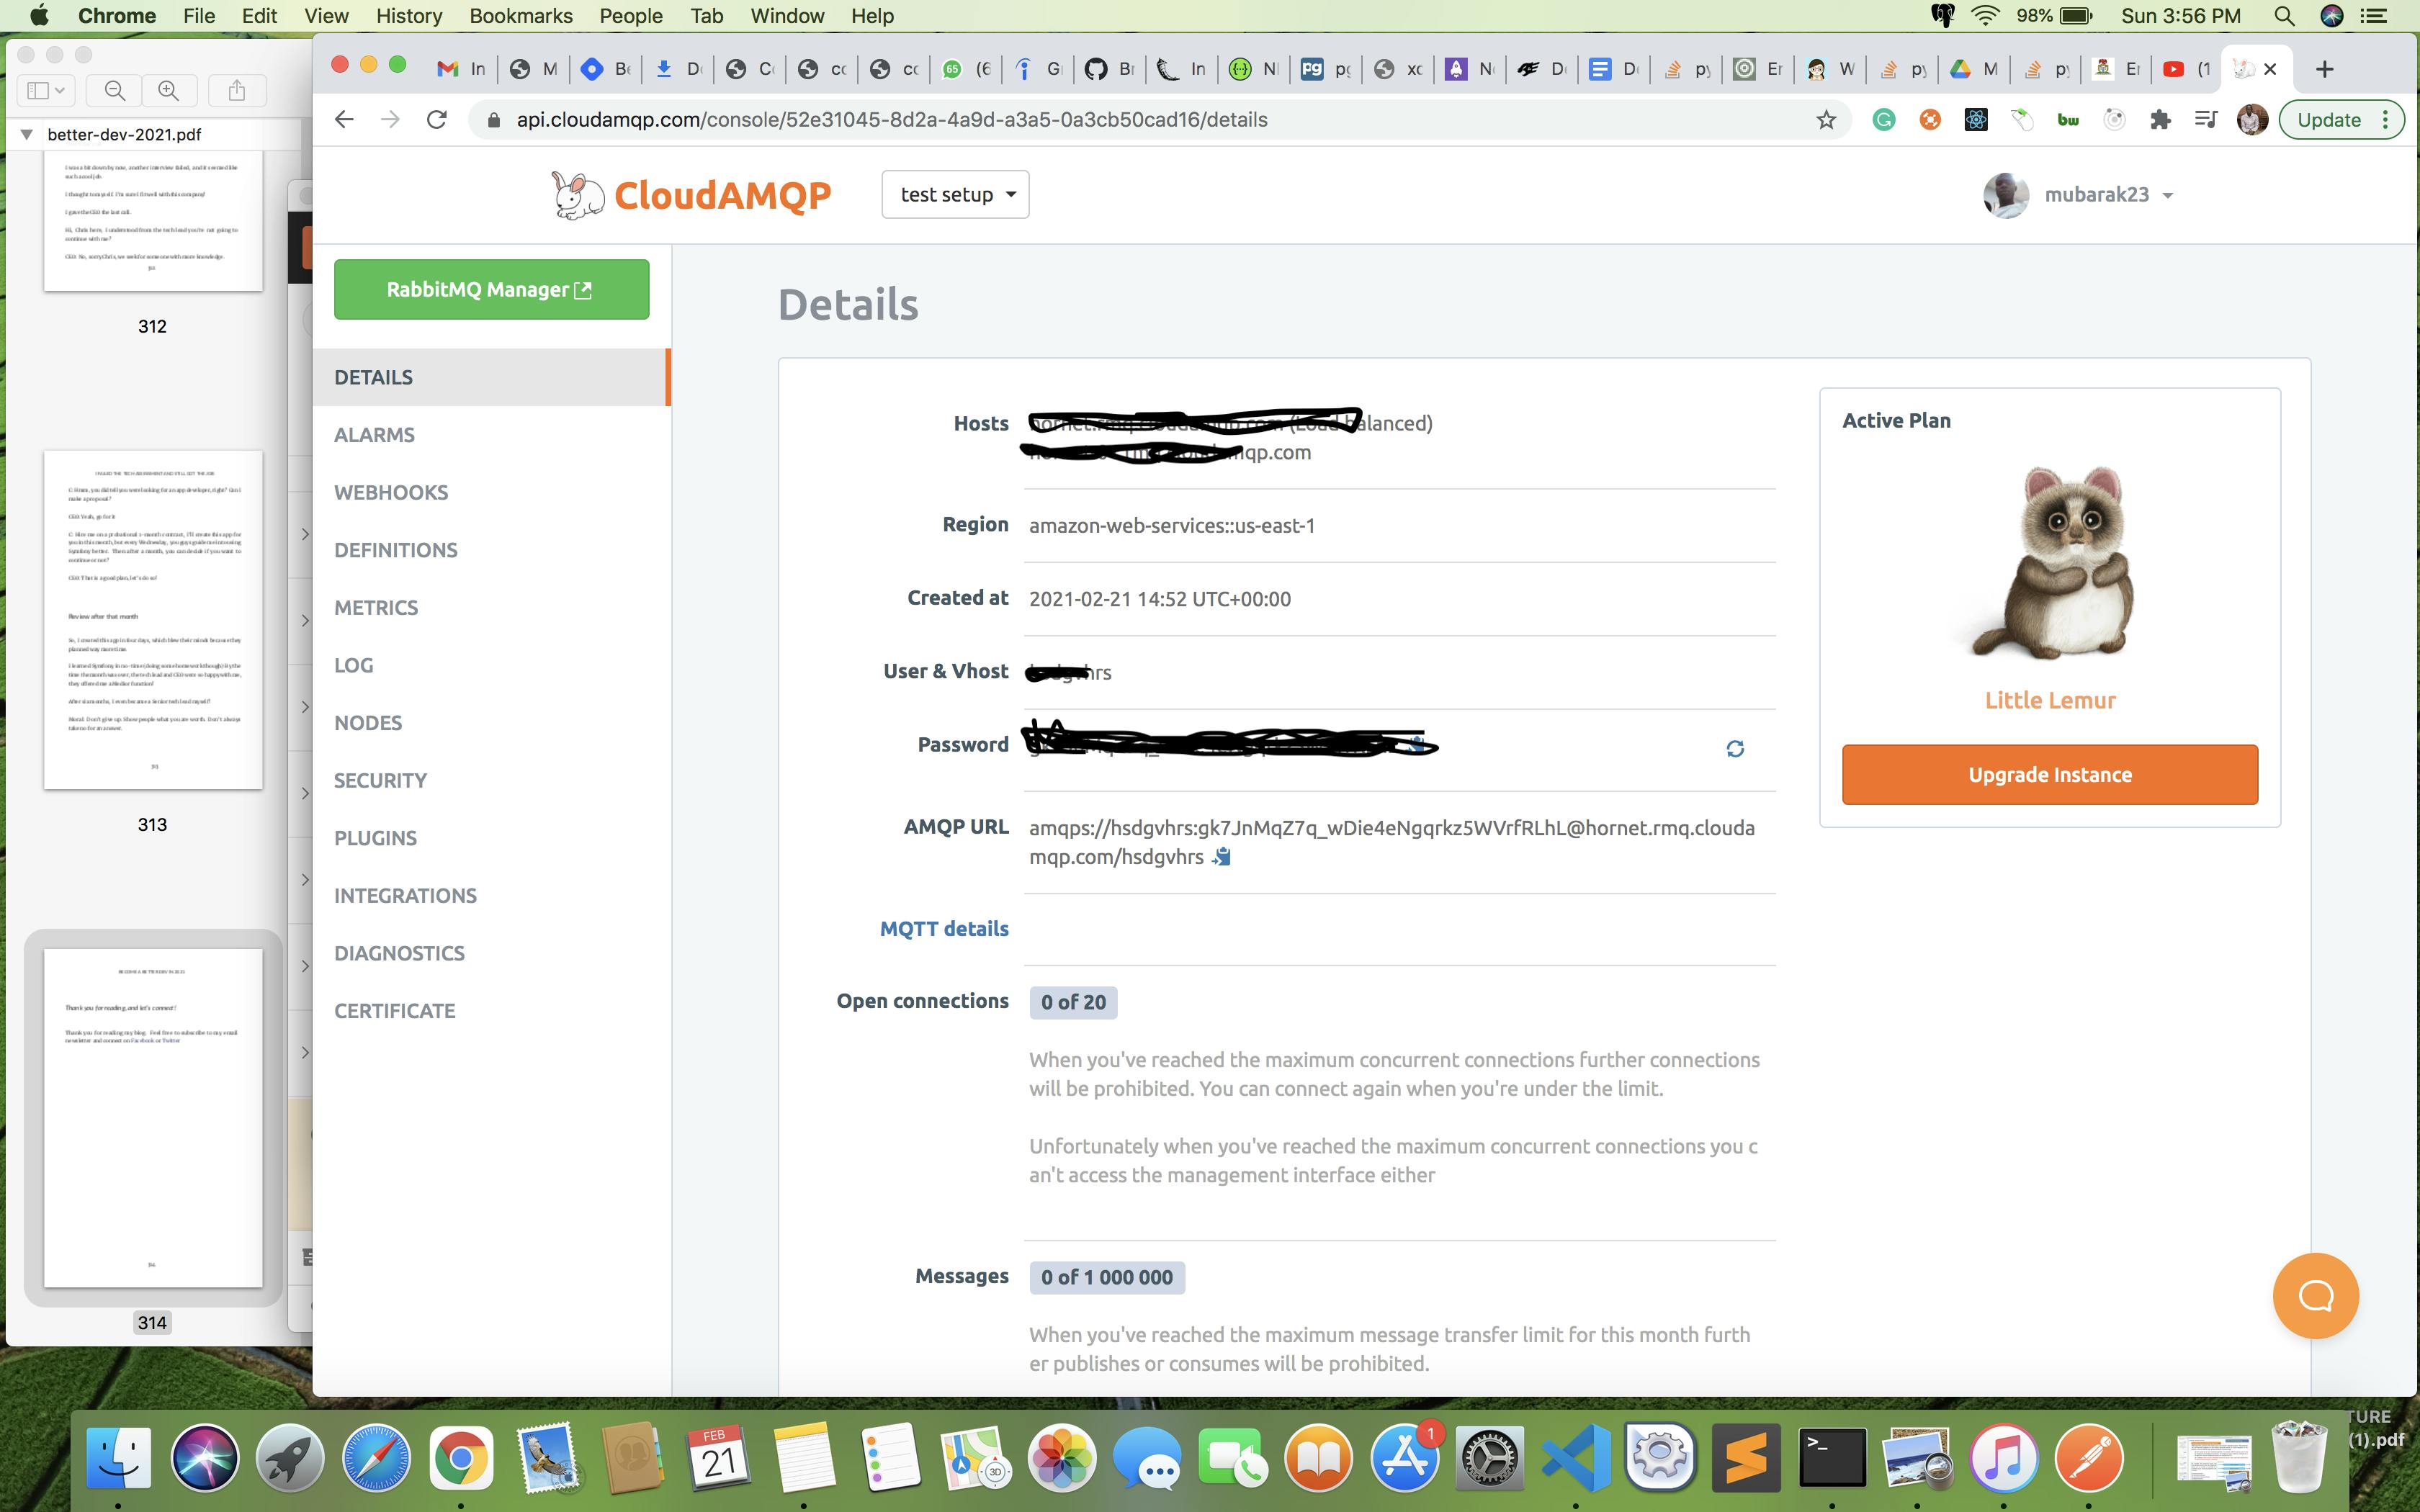
You will need to use them in your environment variable for both laravel apps.
- Create Client Laravel App Using the following command you can create a fresh laravel application
composer create-project --prefer-dist laravel/laravel:^7.0 rb_client
via your terminal. Head over and open the rb_client app folder in a code editor[i use VScode], open the .env file and add the parameter you obtain from your instance
RABBITMQ_HOST=
RABBITMQ_PORT= 5672
RABBITMQ_USER=
RABBITMQ_PASSWORD =
RABBITMQ_VHOST =
NOTE: Your user and vhost parameter are the same --Create an artisan command this command will allow us to fire a command that will dispatch our job
php artisan command: FireEvent
-- Create a job that will be dispatch using the command below
php artisan make:job TestJob
inside the TestJob.php add the following code
 private $data;
    /**
     * Create a new job instance.
     *
     * @return void
     */
    public function __construct($data)
    {
        //
         $this->data = $data;
    }

    /**
     * Execute the job.
     *
     * @return void
     */
    public function handle()
    {
        //
    }
inside your FireEvent.php add the following code
protected $signature = 'fire';

    /**
     * Execute the console command.
     *
     * @return mixed
     */
    public function handle()
    {
        $data = [
            "id" => "134",
            "name" => "rabbitMq",
        ];
        TestJob::dispatch($data);
    }
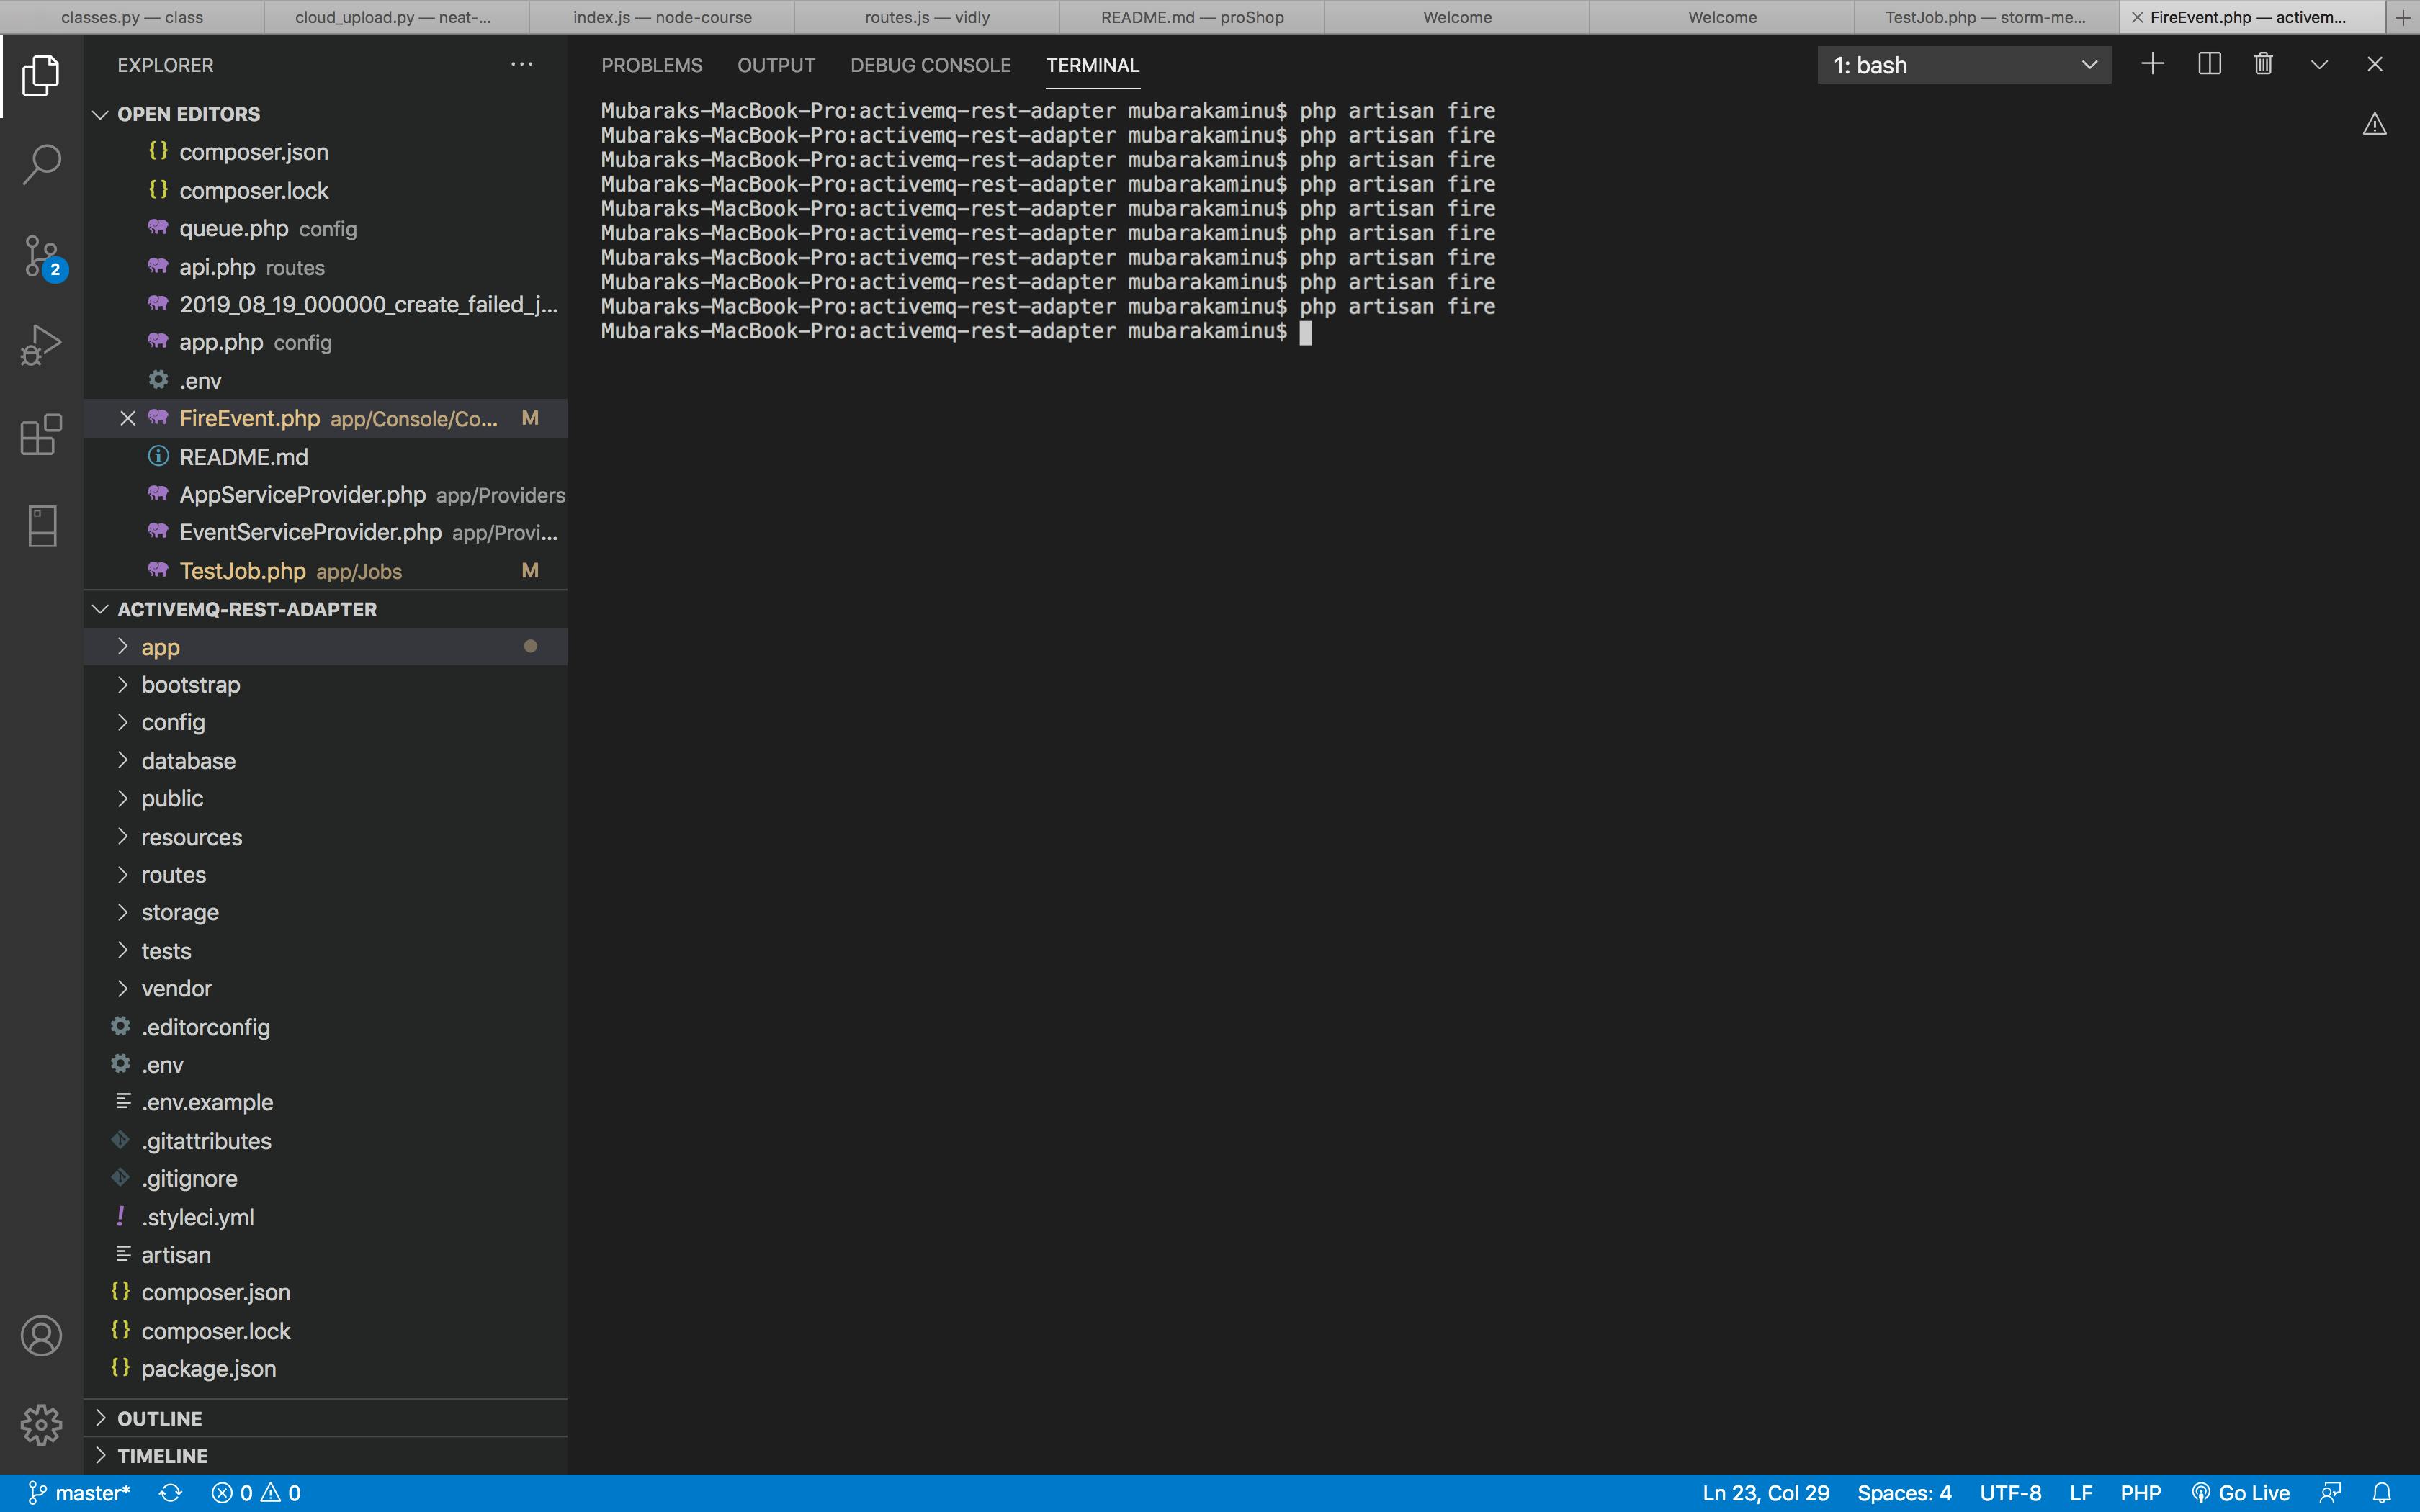
we create a signature with the name of "fire", with this name we can use it to execute an artisan command that dispatches our job. from the handle function, you can see that we are dispatching TestJob, so once we execute the following command on the terminal the job gets dispatch
php artisan fire
our job is sent to the other app that is listening via the queue
- Create the server app.
Using the following command you can create a fresh laravel application
composer create-project --prefer-dist laravel/laravel:^7.0 rb_server
once the app setup is complete, open the app folder in your favorite code editor, use the terminal to create a job via the following artisan command
php artisan make:job TestJob
NOTE: the job name dispatch from the rb_client app has to be the same with job name on the rb_server app
inside the TestJob.php file inside the job folder, add the following code
private $data;
    public function __construct($data)
    {
        //
        $this->data = $data;
    }
    /**
     * Execute the job.
     *
     * @return void
     */
    public function handle()
    {
        echo "Event Has Been Handle" . PHP_EOL;
        echo $this->data["name"];

    }
Here we are collecting the data from rb_cleint and print it on the terminal. Nothing much.
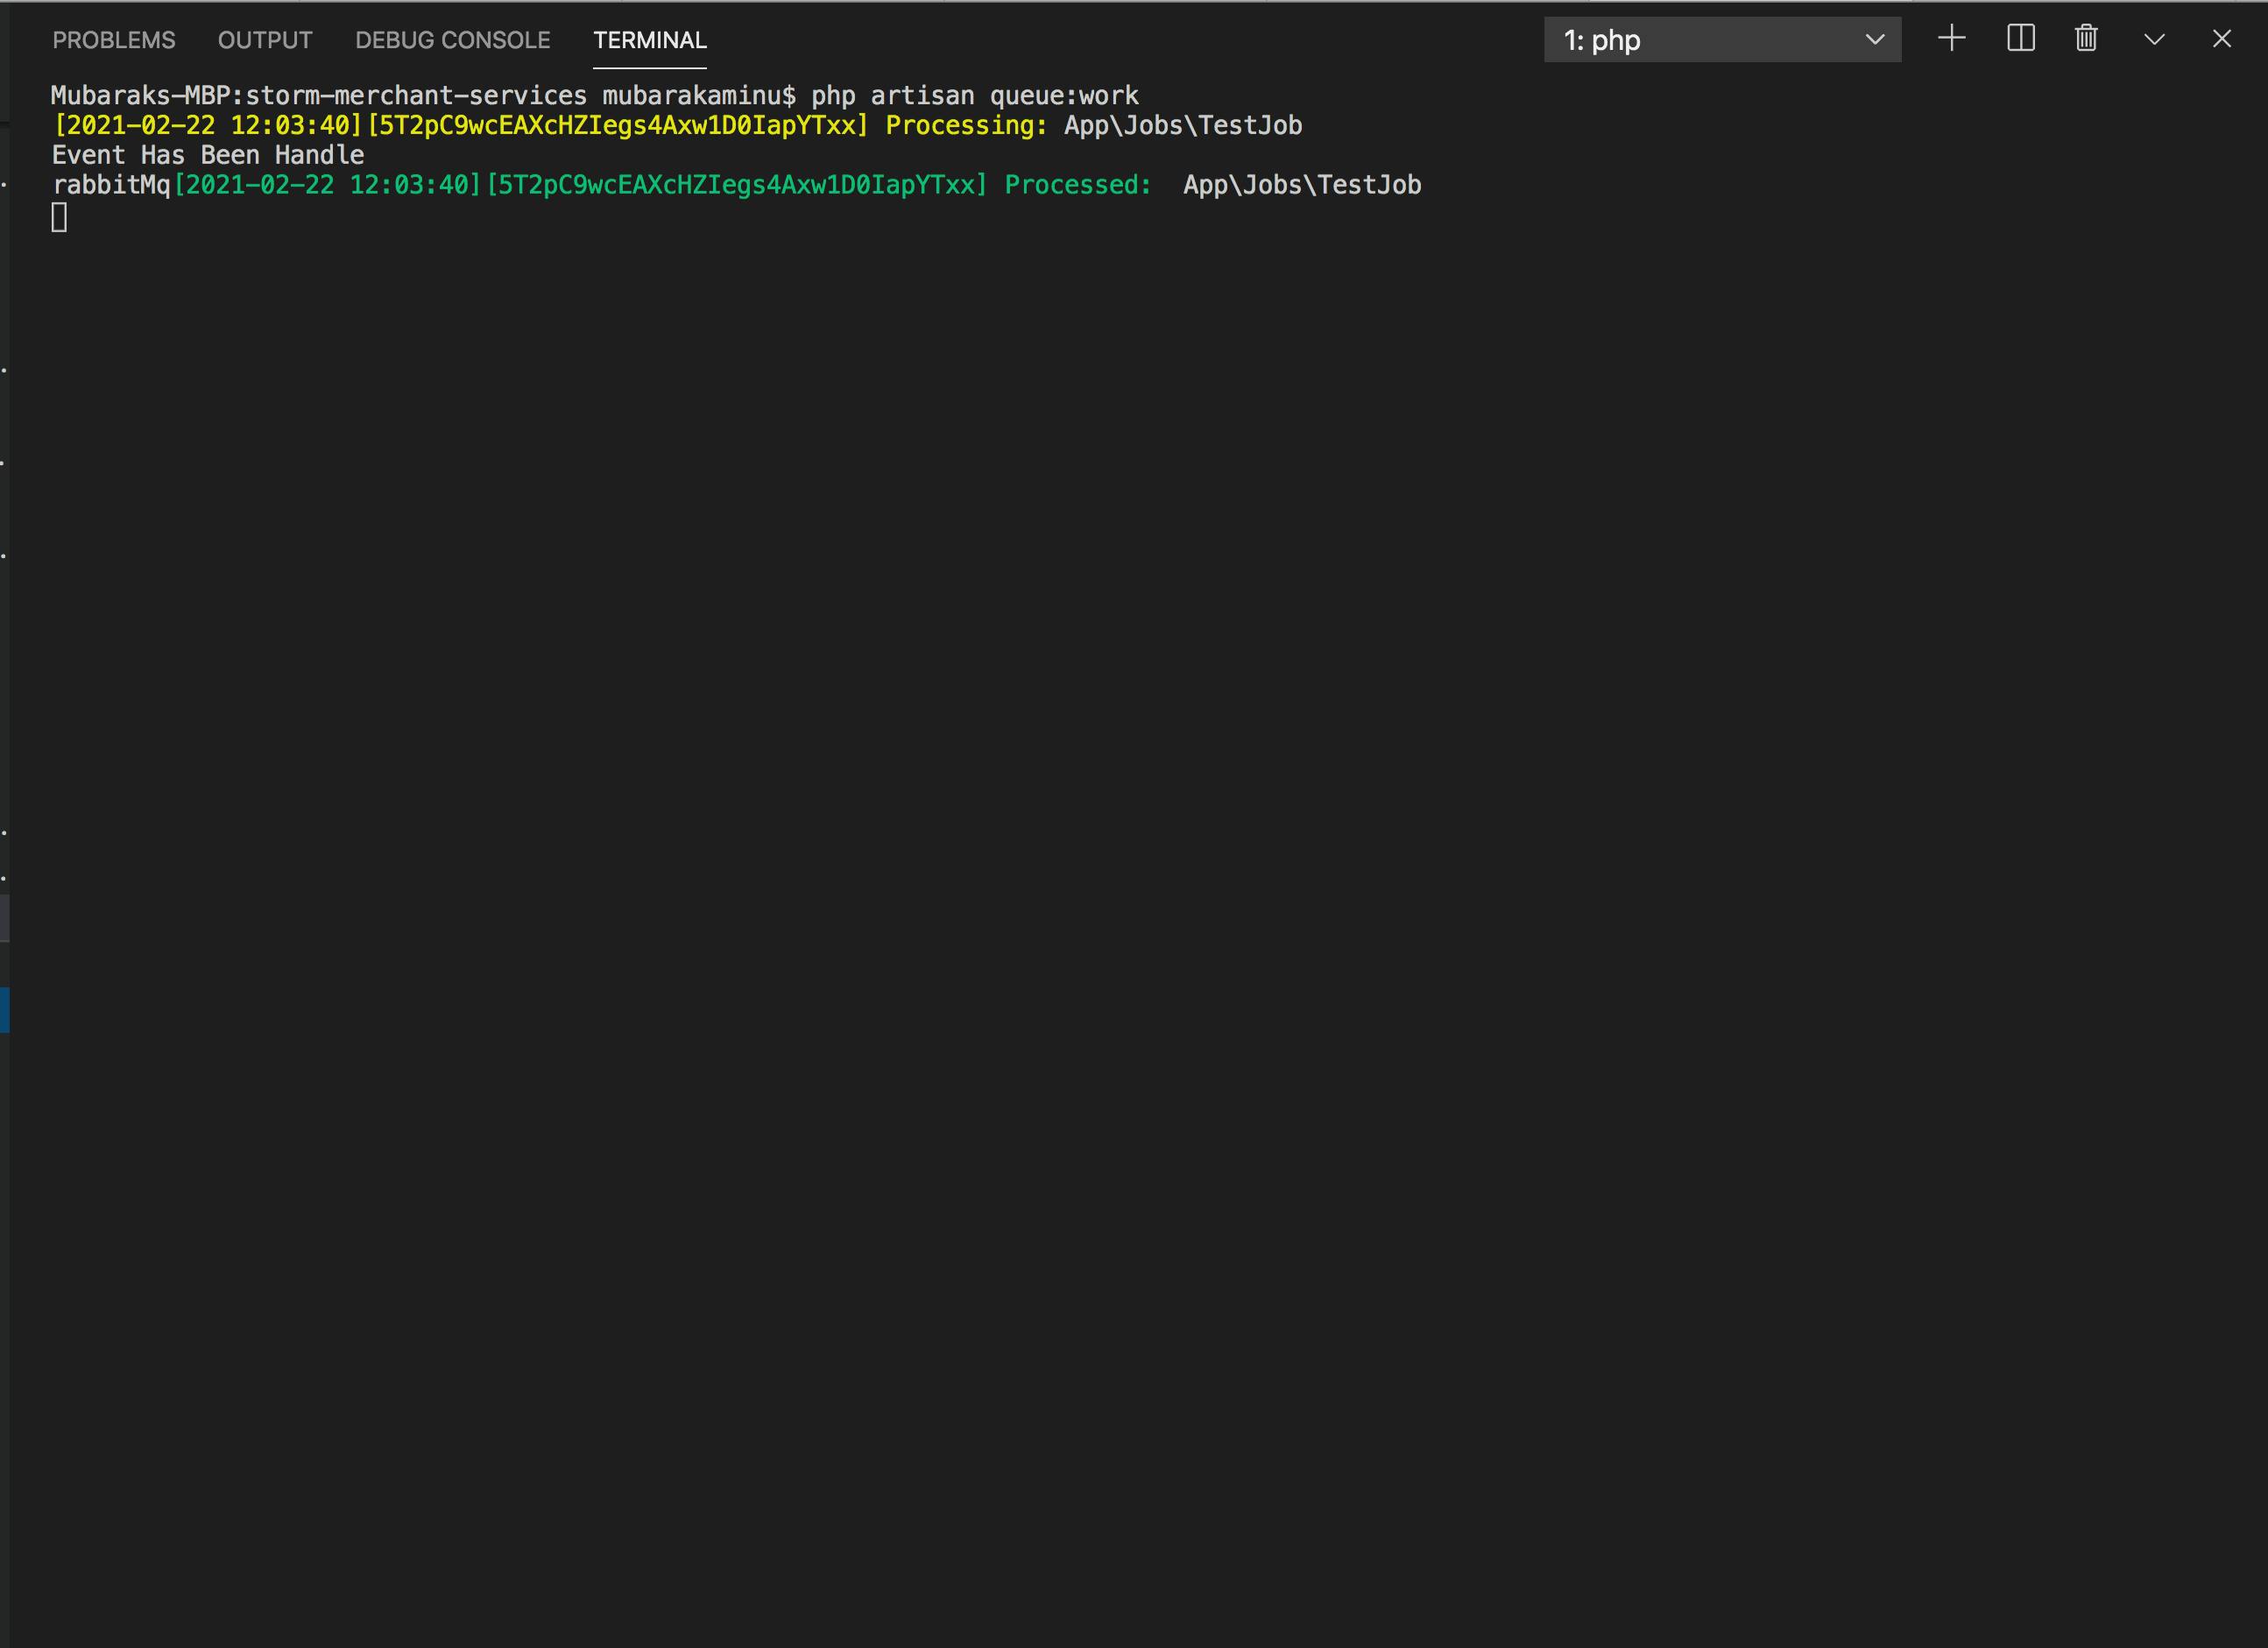
-Test the Implementation On the rb_server app run the following artisan command
php artisan queue:work
the server queue will listen to dispatch events from any of the clients using the same parameter instance and dispatch job as the job is listening on.
on the rb_client run the following command on the terminal
php artisan fire
once it's run successfully move over to your server app and you should see the following data on the terminal as shown bellow
as you can we are printing one data we pass from our client app
This is the end of part 1 of Implementing RabbitMQ Messaging Between Two Laravel Apps,
In part two, we will implement the rabbitMQ messaging via a post request.
If you have any questions, please drop them in the comment section and I will respond.