


So, Have you ever wonder if there is a way to store your images outside of your Laravel application and access them realtime anytime you want with ease, then Cloudinary have you covered, it provides you with a better way to store your images and access them through fast CDN.
Aside from that Cloudinary provides features such as
Deliver responsive images
Easily optimize the image
Easily integrate with web and mobile application
Below are the steps, you will need to take in order to upload images from your Laravel application to your Cloudinary account
Step One:
- install Cloundinary package [jrm2k6/cloudder] via composer, using the following command composer require jrm2k6/cloudder:0.4.*

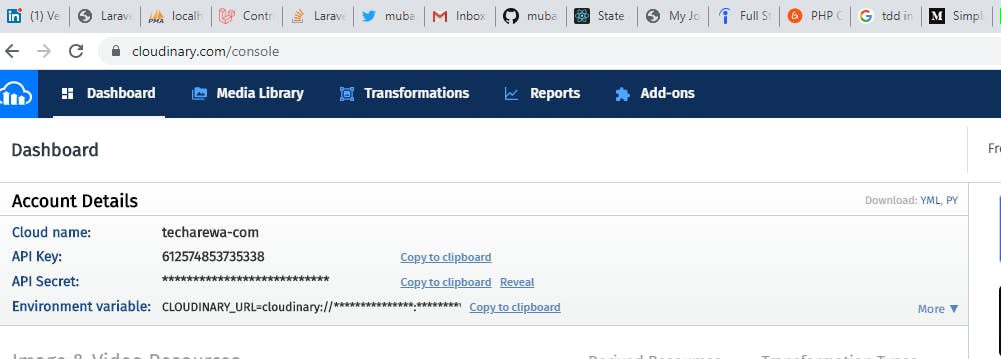
While the composer is installing the package on your application, head over to https://cloudinary.com/ and create an account with them. On the dashboard of your account, you will have access to some API keys that you need when configuring your Laravel Application
API KEY, API SECRET, CLOUD NAME
Once composer is done with the installation of the package head over to you application folders and open app.php inside your config folder
Inside you config/app.php, add the following line of code to your provider array " JD\Cloudder\CloudderServiceProvider::class, " and add this "'Cloudder' => JD\Cloudder\Facades\Cloudder::class " to your aliases array.


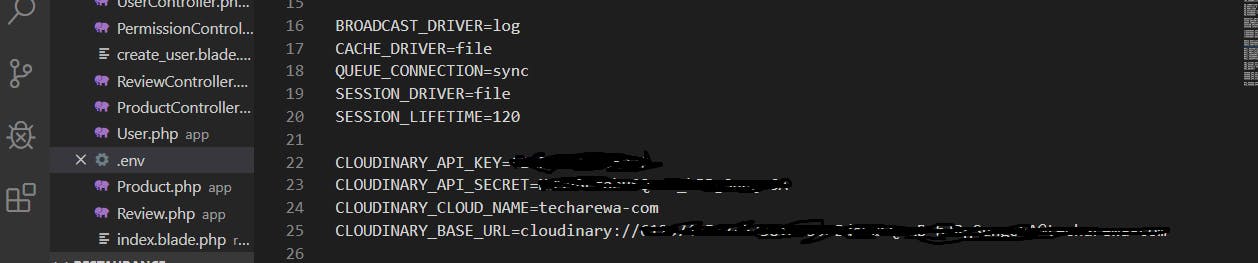
Add the following code inside your .env file, this will serve as your api keys that will be used in cloudder file to connect your application with your Cloudinary account. CLOUDINARY_API_KEY, CLOUDINARY_API_SECRET, CLOUDINARY_CLOUD_NAME
Run the following command to create your cloudder.php file " php artisan vendor:publish --provider="JD\Cloudder\CloudderServiceProvider" " this will store the file inside the config folder, ensure that the correct environment variables are called correctly.

Step Two
- Create two routes that will show the view file that contains a form for uploading your image, now you can choose to build you form the way you want it, maybe it is a model that collects user details including image profile, or a form that collects product details.
'Route code goes here'
Route::post('product/create',[
    'uses' => 'ProductController@create',
    'as' => 'product.form',
    'middleware' => 'auth'
]);
- Create the second route that links the form data with a controller method that processes it. 'Group Route'
Route::post('product/store',[
    'uses' => 'ProductController@store',
    'as' => 'product.store',
    'middleware' => 'auth'
]);
Step 3.
- Create a view file that has a form that collects the image, in this case, am going to create a view file that collects products details such as name, price, image,
- Below is the code that processes your image and uploads it your Cloudinary account, once you click on the submit button, if everything when well, you should see your image on Cloudinary account.
you will need to insert cloudder facade at the top of your controller
use JD\Cloudder\Facades\Cloudder;
public function store(Request $request)
    {

        $this->validate($request, [
            'name' => 'required|max:100',
            'price' => 'required'
        ]);
        //$new_product = new Product();
        //$new_product->name = $request['name'];
       // $new_product->price = $request['price'];
        //$new_product->rating = 0;
        //$new_product->user_id = Auth::id();
        $data = $request->all();

        if ($request->hasFile('image')) {
            //return 'Good From Here';
            Cloudder::upload($request->file('image'));
            $cloundary_upload = Cloudder::getResult();
            $new_product = new Product();
            $new_product->name = $data['name'] ;
            $new_product->price = $data['price'];
            $new_product->user_id = Auth::id();
            $new_product->rating = 0;
            $new_product->image_url = $cloundary_upload['url'];
            $new_product->save();
            //$originalImage = $request->file('image');
            //$orignalPath = public_path() . '/images/products';
            //$img_name = time() . $originalImage->getClientOriginalName();
           // $new_product->image_url = $img_name;
        }
        //$new_product->save();
        return redirect()->route('product.index')->with('flash_message', 'Product add Successfully');
    }
Cloudinary return object
{"public_id":"msk0thwirt5youlv78nb","version":1579852560,"signature":"b89db96c61283dad19535c6a47437814fa145dc0","width":225,"height":225,
"format":"jpg","resource_type":"image","created_at":"2020-01-24T07:56:00Z","tags":[],"bytes":4469,"type":"upload","etag":"e61c0b371021e47c24afba2323e06c9c","placeholder":false,"url":"http:\/\/res.cloudinary.com\/techarewa-com\/image\/upload\/v1579852560\/msk0thwirt5youlv78nb.jpg",

"secure_url":"https:\/\/res.cloudinary.com\/techarewa-com\/image\/upload\/v1579852560\/msk0thwirt5youlv78nb.jpg","backup_url":"api.cloudinary.com\/v1_1\/techarewa-com\/resources\/68eef69bb89927d1d9a2a5a78a1b5d24\/backup\/9733e1cbd53221f85c33c12102f7eaf9",

"original_filename":"php9DFD","original_extension":"tmp"}
The Cloudinary return this array that contains data about the image, at this instance, it will be best to store your image URL in table field i.e image_url. this will ensure the image is called whenever the image_url is used. this is the end of this tutorial. if you have any question drop it in the comment and I will do my best to answer your question. You can connect with me on twitter at my handle 200OKDeveloper